Have you ever needed to edit a ton of pages in Kentico (e.g., to correct an import mistake)? If so, you may have found that it's not possible to view all of them via the tree view, as you are limited to viewing the first 100 pages. You may also have noticed it is very cumbersome to navigate to each of the pages via the listing view:
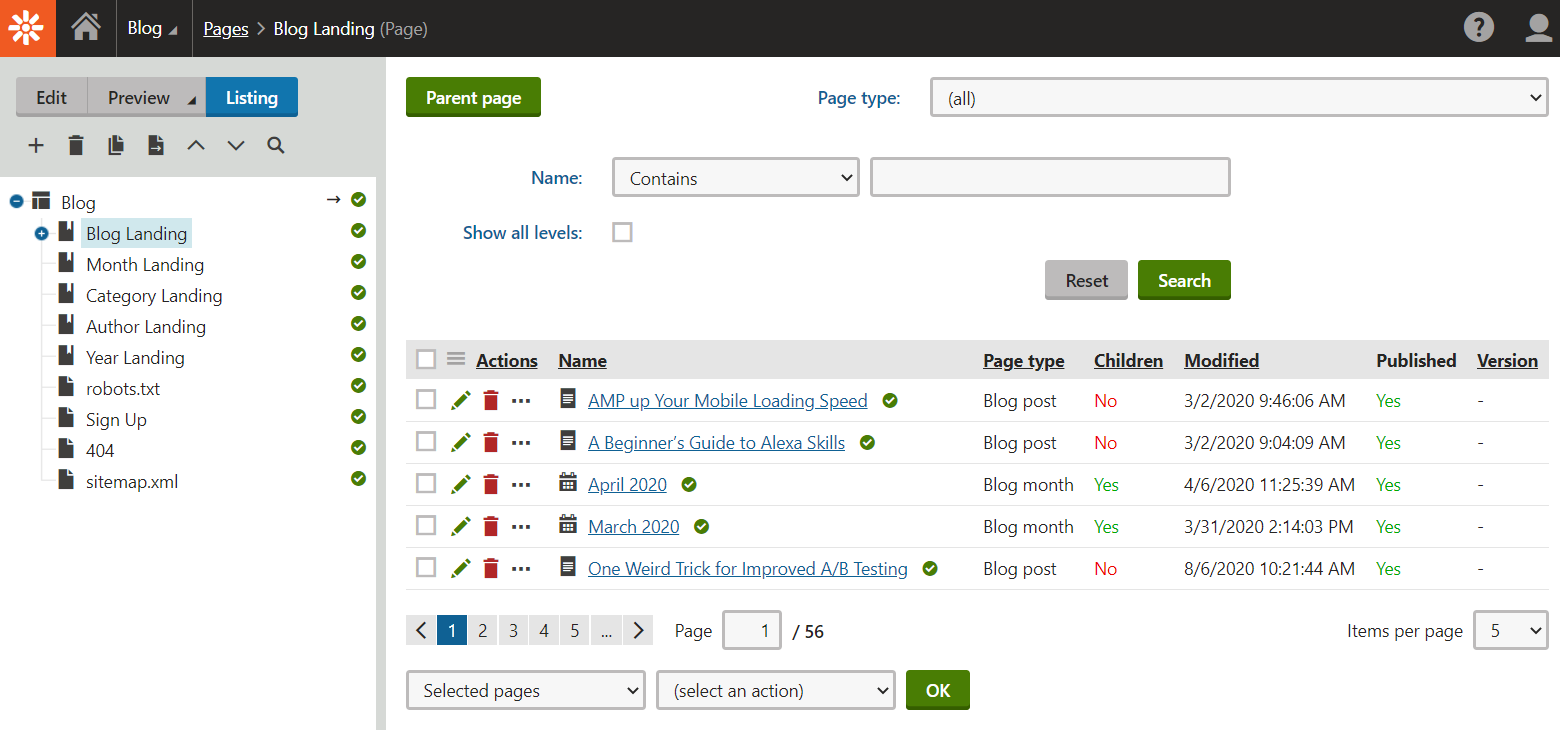
Here is your workflow if you try view each page via the listing view:
- Change the page size to 100 to view more pages at once.
- Click on the page number.
- Scroll up or down to find the page you're looking for, visually scanning for it.
- Click the page.
- Click "Edit" to change to edit mode.
- Make some edits.
- Click "Listing".
- Navigate back to the parent page.
- Repeat this process again for each of hundreds of content nodes.
Not exactly the quickest process. Luckily, with a very small amount of technical know how, there is another way.
When you view the listing page, each page is anchor linked. Each anchor link is an href that is a JavaScript command instead of a URL. If you can run this JavaScript command, it is the same as clicking the link. In order to do this, view your listing page and select 100 items per page (in the below example, I just have 5 to keep the screenshot small):
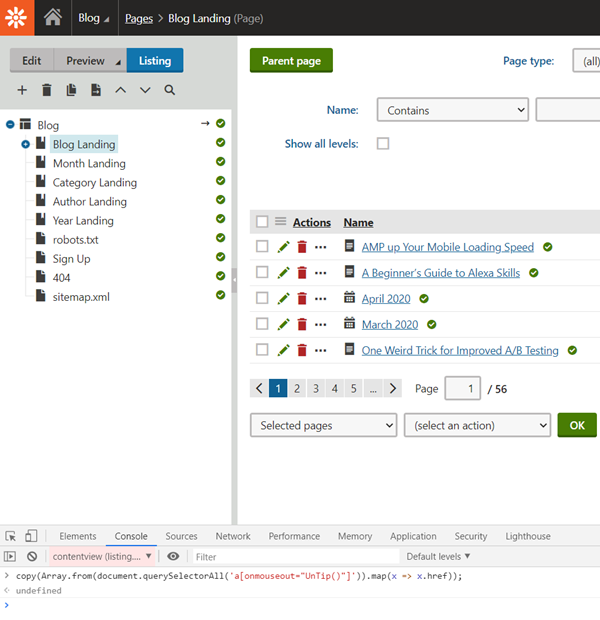
Open the Chrome developer console (or the developer console in your browser of choice) and run the command shown in the above screenshot. You can also copy it from here:
copy(Array.from(document.querySelectorAll('a[onmouseout="UnTip()"]')).map(x => x.href));
That will extract the hrefs from each of the visible links in the list. If you have multiple pages, you will have to do this once per page. Once you paste, you will end up with something like this:
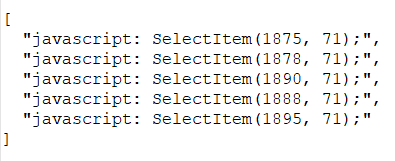
Your list will be much longer, however (remember, I'm just using 5 items for demonstration purposes). With some find/replace in your favorite text editor, transform the above text to this:
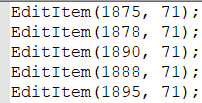
Each of these lines is a JavaScript command. Copy one of these lines into your console and run it, as shown below:
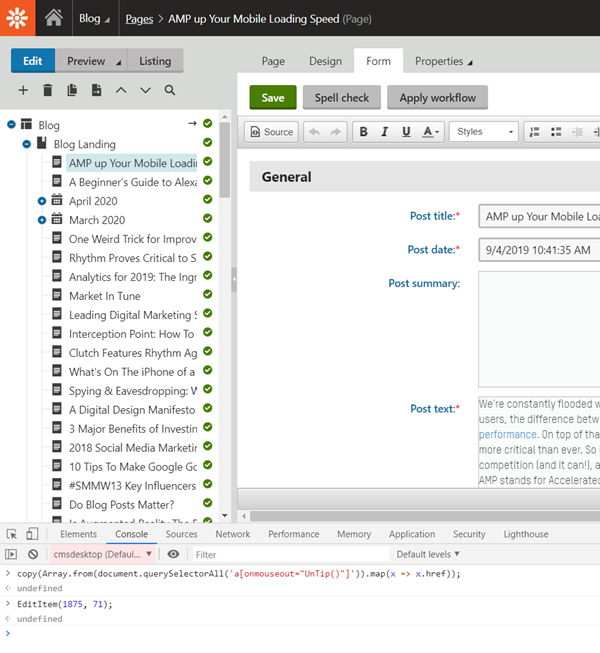
That will select the page identified by the first parameter (in this case, the 1875 parameter corresponds to the "AMP up Your Mobile..." page), and it will enter edit mode (so you can make your edits immediately). When you are ready to edit your next page, just select "Listing" to enter listing mode (the JavaScript only works in listing mode), then paste in the next line in your console:
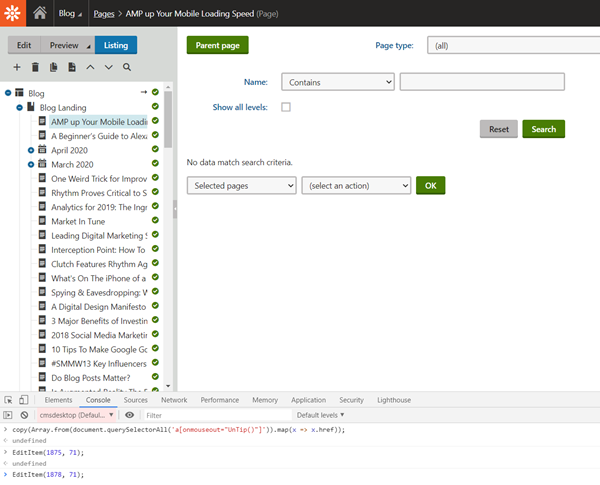
If at any piont any of the JavaScript commands don't run, be sure you've chosen the correct frame in the top left of your developer console:
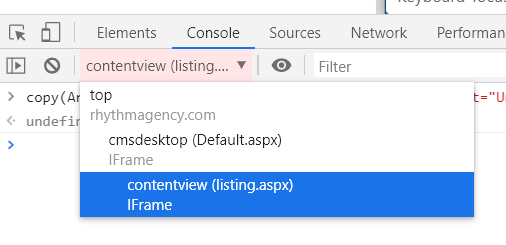
It should be the most deeply nested item. Alternatively, you can change the JavaScript commands a bit so they automatically select the correct iframe for you. Instead of this:
EditItem(1878, 71);
You can do something like this:
(window.EditItem || document.querySelector("iframe").contentWindow.EditItem || document.querySelector("iframe").contentDocument.querySelector("iframe").contentWindow.EditItem)(1878, 71);
And you will never need to manually select the correct frame manually via the drop down.
This now means your workflow for editing each page is the following:
- Choose "Listing".
- Paste the JavaScript line.
- Make your edits.
- Repeat this process for each of your pages.
Not only will you avoid the frustration of having to remember the title of each page you've already viewed, you'll save hours by skipping all those unnecessary steps with the manual process. If you need any help with this or any other Kentico tasks, feel free to reach out to us at Rhythm Agency.


